
Group Details
On this page you see and manage a group's members and the projects it can reach. Adding and removing members and projects happens here.
When to use it
- To add people to a group or remove them from it.
- To give a group access to a project or take it away.
- To deactivate or delete a group.
Step by step
1. Open the page
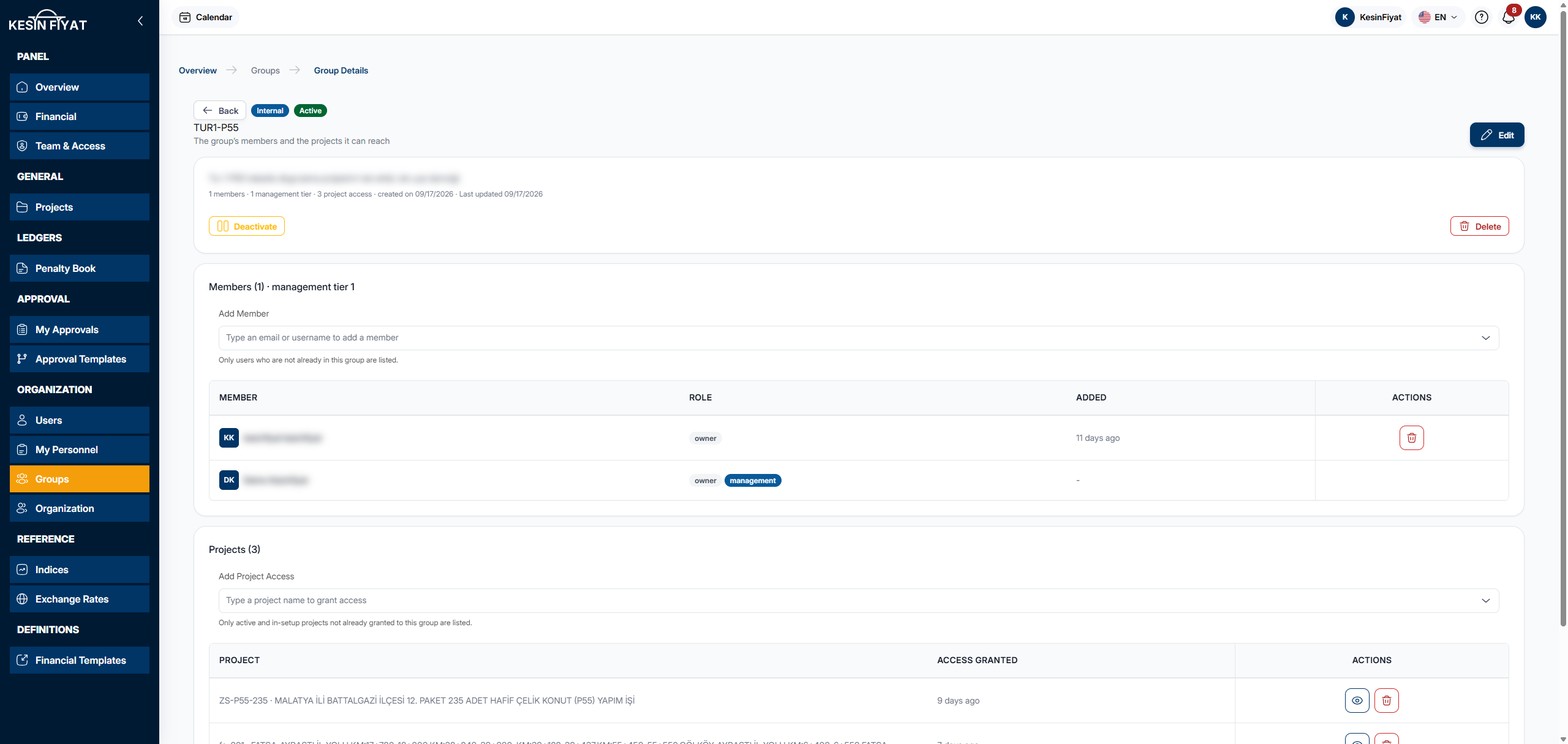
On the Groups list, click the eye button (View) at the end of the row.
The heading shows the group's name with the Internal badge and an Active or Passive badge. The Back button returns to the Groups list. The Edit button opens the page where you change the group's name, description and whether it is active.
2. Read the summary card
The card shows the group's description and a short summary: the number of members, the management tier, the number of project accesses, and the creation and last update dates.
The management tier is the company owner and administrators, who see all projects through their role. They appear in the member list even without being added to the group.
3. Add a member
In the Add Member box on the Members card, type the person's e-mail address or username and choose them from the list. The list shows only users who are not already in this group.
The person is added to the group as soon as you choose them. No confirmation is asked. You can undo the addition within 5 seconds with the Undo button in the message that appears.
4. Read the member list and remove members
The list shows each member's name, role and when they were added (Added). People with the management badge next to their role are the management tier; they cannot be removed from the group.
When you click the trash button (Remove) on a row, Are you sure? appears. Yes removes the person from the group and Cancel stops. You can also undo a removal within 5 seconds with Undo in the message.
5. Give or take away project access
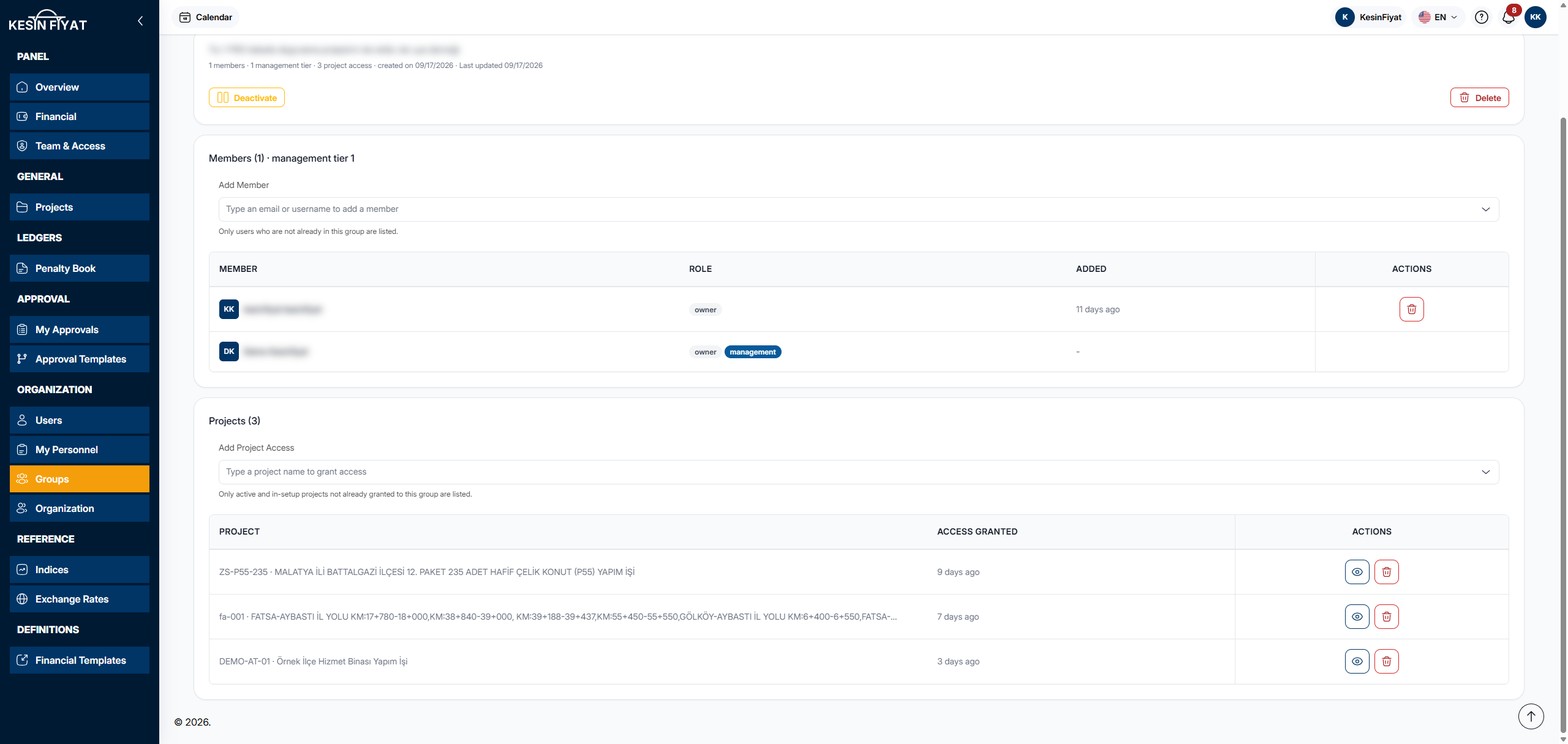
In the Add Project Access box on the Projects card, type a project name and choose it from the list. The list shows only active and in-setup projects not already given to this group.
The group gets access to the project as soon as you choose it. No confirmation is asked. You can undo it within 5 seconds with Undo in the message.
The list shows each project's name and when access was given (Access granted). The eye button (View) opens the project's page. The trash button (Revoke access) first asks Are you sure?, and Yes takes the access away.
If this is the only group with access to the project, the No group would be left with access to the project window opens when you take the access away. Transfer to base group and apply transfers the project to the base group (Genel) and takes the access away.
6. Deactivate the group
The Deactivate button on the summary card first opens the Deactivate Group confirmation window. The window says that members of a passive group cannot reach its projects.
If you confirm, the group becomes Passive and Activate appears in place of the button.
7. Delete the group
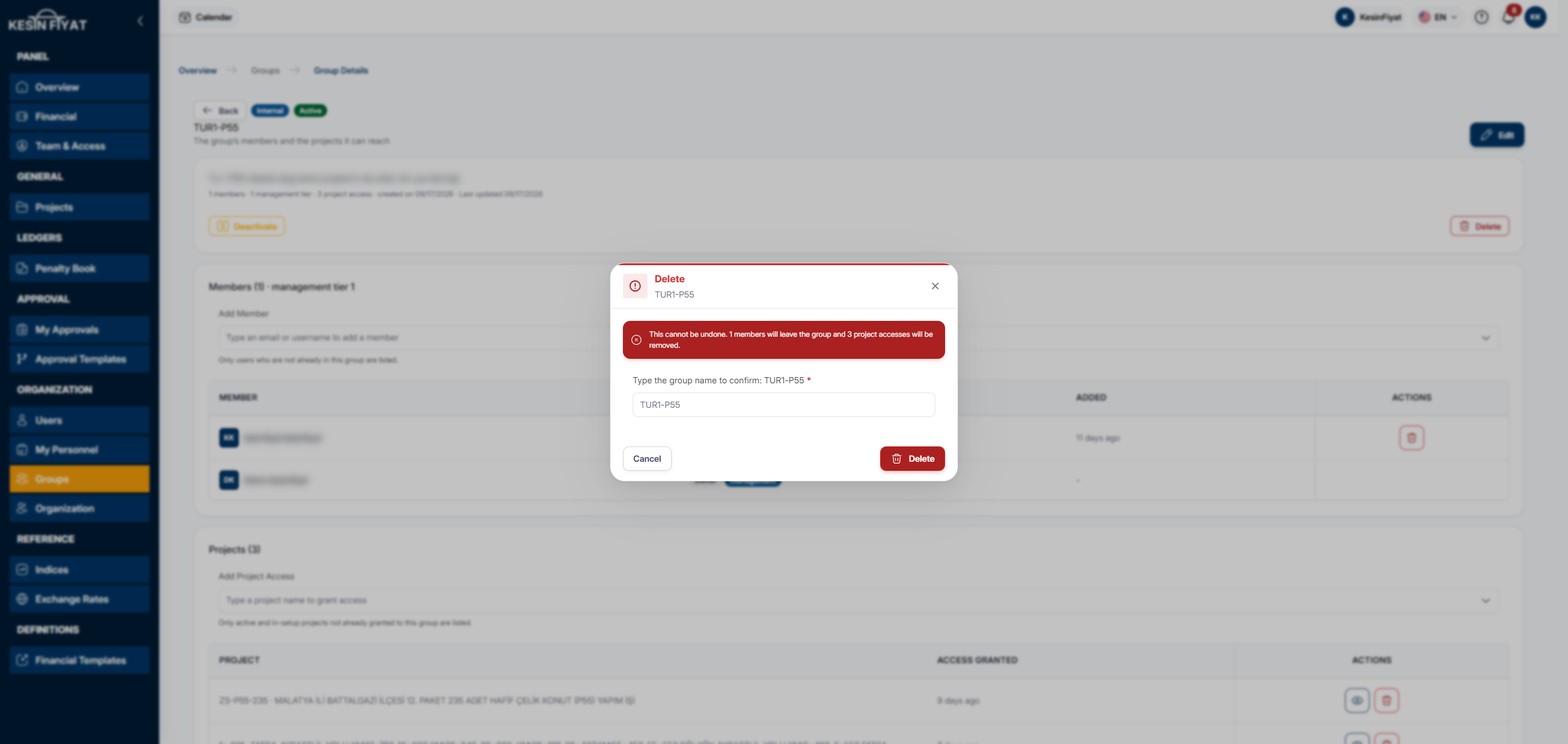
The Delete button on the summary card opens the delete window. The window says that this cannot be undone, how many members will leave the group and how many project accesses will be removed. If the group carries pending approval steps, their number is also shown.
Type the group's name exactly in the box and click Delete. If the name does not match, Group name does not match appears and the group is not deleted. Cancel closes the window.
The members of a deleted group are moved to the base group (Genel). Projects reached only through this group are also transferred to the base group.
8. Know the base group
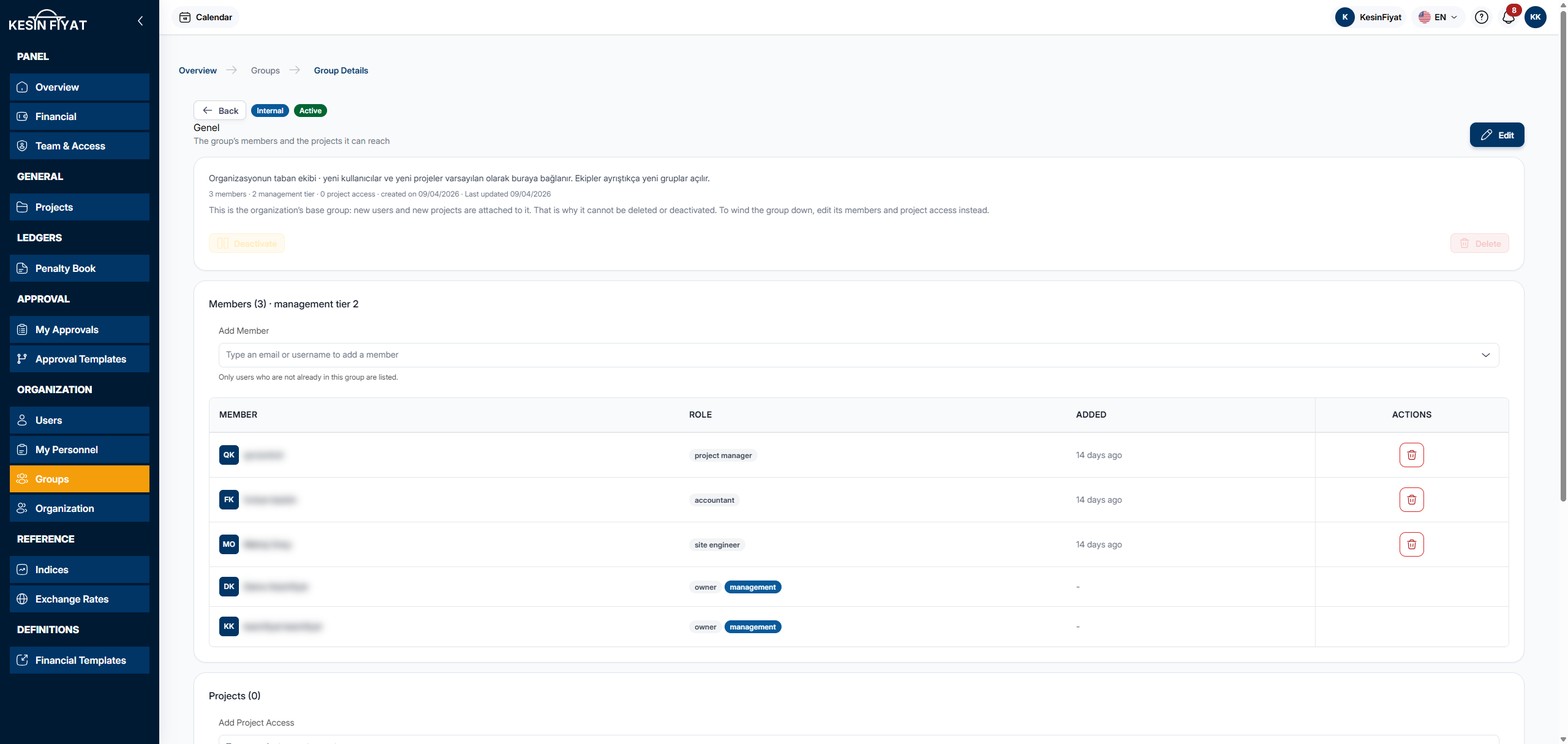
On the page of the base group (Genel), a note says that this is the company's base group. New users and new projects are attached to it. That is why the Deactivate and Delete buttons cannot be pressed.
You can still change the base group's members and project access.
Things to keep in mind
- All roles can see a group's page. Adding and removing members and projects, deactivating and deleting appear only for people who can manage the group: the company owner and administrators on every group, project managers and tender officers only on the groups they created.
- In the Add Member and Add Project Access boxes, the change is saved the moment you choose.
- Project managers and tender officers can add to a group only the projects they can reach themselves.
- Members of a passive group cannot reach its projects.
Cannot be undone
- A deleted group cannot be brought back. To turn a group off for a while, use the Deactivate button.
Frequently asked questions
I added the wrong person. What should I do?
Click Undo in the message within 5 seconds. If the time has passed, use the Remove button on the person's row.
Why does the company owner appear in every group?
The company owner and administrators see all projects through their role. That is why they appear in every group's member list with the management badge. You do not need to add them to a group or remove them.
What happens to the members' access when I delete a group?
The members are moved to the base group (Genel) and see the base group's projects. Projects reached only through this group are also transferred to the base group.